eViewPlus: How to create a new request
A quick guide to creating a customised request form with a QR barcode containing all your patient and test details.
1. To create a New Request, click on the New Request icon in the left hand menu.

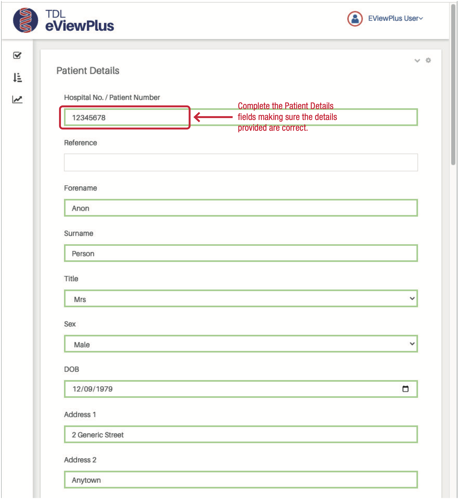
Patient details
2. This will display panels containing the fields for your New Request. Please complete the first panel, Request Details, with all the information you require, making sure the details you provide are correct.

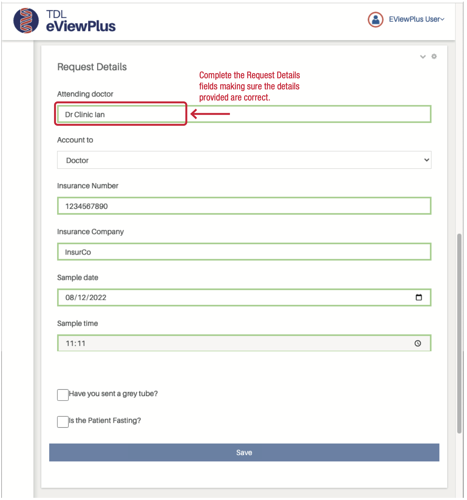
Request details
3. Please complete the second panel, Request Details, with all the information required, making sure the details you provide are correct.
You do not have to complete all the fields, only those that are relevant to your request.

Selecting tests
4. In the panel below Request Details you can select the tests you require for your patient.
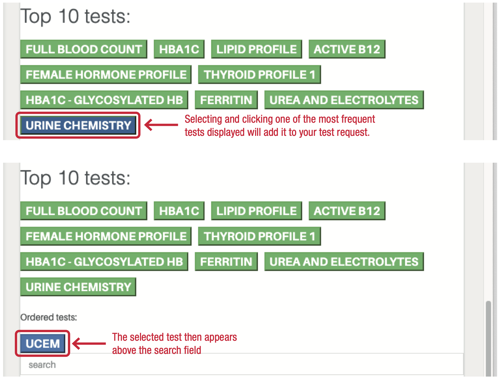
This panel will display your 10 most frequently requested tests at the top. Clicking on one of these highlighted tests will add that test to your request.

If you would like to add other tests, in the search field, please type in the first 4-5 characters of the test name, or TDL test code you require.
See Tests A–Z for test codes and descriptions.
5. A dropdown menu will appear showing the matching test results from the TDL test library. Scroll down
to the test you require, then select the test you require. It is important that the correct test code is selected.

6. This will add a blue box above the search field containing the corresponding test code.

7. Take particular care that the tests you select are the ones you require. More details can be found in the TDL Laboratory Guide.
8. You can add more tests by repeating steps 4 to 5. Additional test codes will then be displayed above the search field.

9. If you wish to remove any test codes you have chosen, click on each of the blue boxes you would like to remove. In the example below we click on the FBC test code to delete it.

9. If you want to order more than 10 tests you will need to create a separate sheet. There is a Request Again option, once you have completed this request.

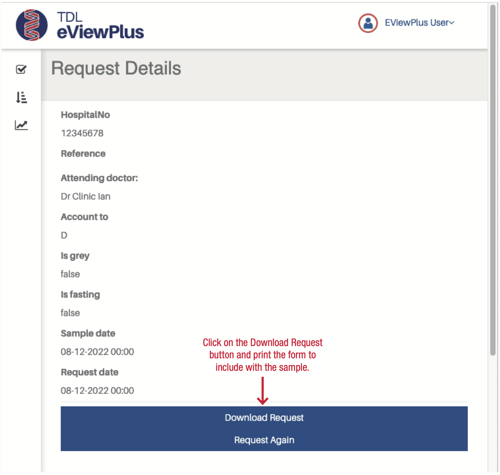
11. Click on the Download Request button and print the form to include with the sample. The record may not allow you to move forward unless the necessary information is provided.
12. Printing can be done in black and white or colour, depending on your printer set up.
This form must be included or testing may be delayed or not carried out.
Clinics/doctors have the option of sending the downloaded request form to the patient for them to print locally if required.

13. Click on Request Again to reopen the Request process with some fields already populated.
If you have any questions regarding eViewPlus please contact eviewplus@tdlpathology.com and we will be happy to help.
